View Basket0 item(s) in the basket.
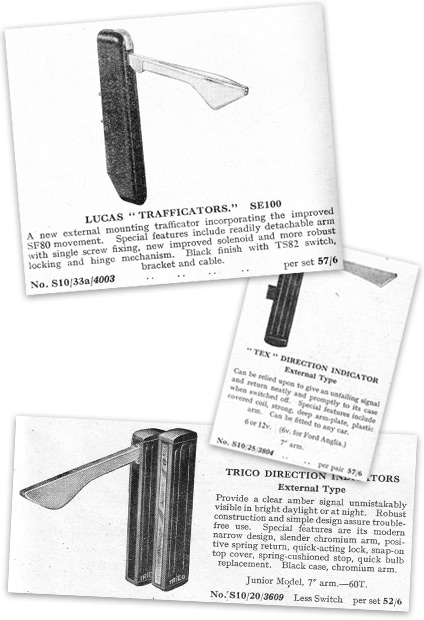
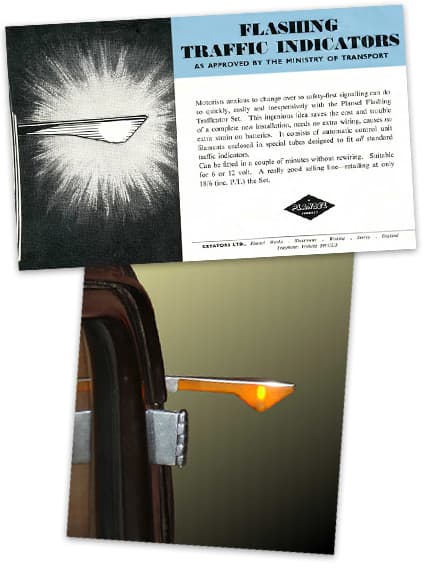
Trafficator adverts 1954
Semaphore type Trafficators first appeared on vehicles in the 1900s, but these first examples were cable operated. Electrical solenoid operation appeared in 1923 and the familiar illuminated and solonoid-raised arm was made by Ruhl and Neuman in Berlin 1927. Their semaphore flag arm was based on the Bavarian railways' signal arm. The new trafficators were quickly adopted as a huge improvement to hand signals.
Trafficators were usually incorporated into the door pillar on saloon cars, but were often mounted in external boxes on commercial vehicles or retro fitted to older vehicles this way. This guide includes details for the Lucas SF80 mechanism (known as the SE100 when fitted into an external case). This was the most widely used trafficator on British-made cars until the modern flashing amber indicators became the norm in the 1950s. Other brands such as Tex and Trico were very similar in operation, so this guide should help care for them too.
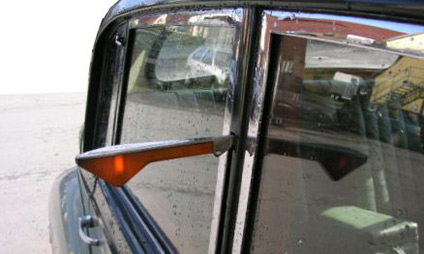
Raised Semaphore Arm - Photo by Timo Beil
Interestingly in the early 1960s, a conversion kit was offered to add a flashing function for owners of older vehicles that didn't want to fit new external indicator lamps. The Plansel product used a tiny mechanical relay that fitted into the semaphore arm, so no wiring skills were required.
Classic Bulbs has developed a modern answer to this old conversion kit. A double-sided LED replacement for the original festoon bulb. This slimline solution features super-bright amber LEDs with an in-built chip with the correct indicator flash timing (unlike others we have seen). This is available for 6-volt and 12-volt systems. A significant improvement in safety, as well as drawing less current than the old incandescent bulbs.

Originally fitted with 12-volt Lucas No. 256 or 6-volt Lucas No. 255 bulbs, each of the 3-watt festoon type. As noted above, we would strongly recommend updating to flashing LED bulbs for safety.
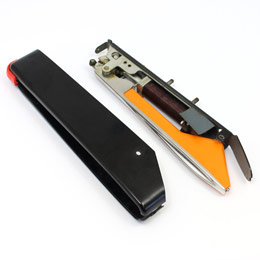
Every three months, or if the arms become stiff at any time, raise each arm and, by means of a brush, matchstick, or another suitable article, as illustrated, apply a drop of thin machine oil. Only the merest drop of oil should be used-any excess may affect the working of the operating mechanism. The Trafficators are kept in the closed position by means of a spring. The arms can be pulled out by hand. If any difficulty is experienced, switch the Trafficator on, and then, supporting the arm in a horizontal position, move the switch to the "off" position. The illustrations show a brush, but the extension tube for GT85 spray oil is ideal to apply a tiny amount. The methods of lubricating two different models of the Trafficator are illustrated in Figs. 1-3.
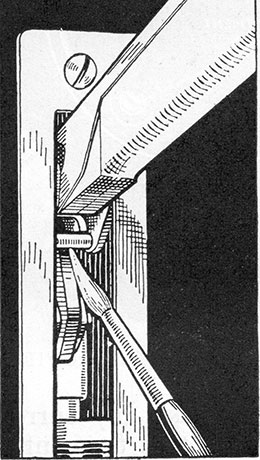
Fig. 1 With this model, apply a drop of thin oil to the catch pin between the arm and the operating mechanism
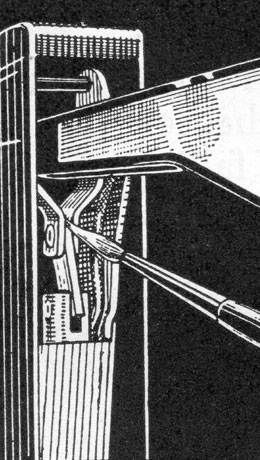
Fig. 2 With this model, apply a drop of thin oil to the two hinged joint between the arm and the operating mechanism
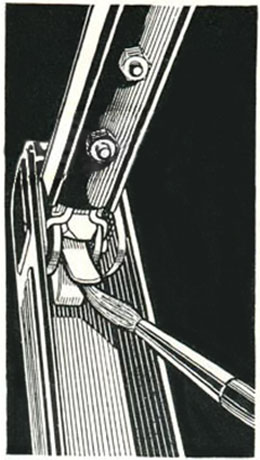
Fig. 3 On this model, apply a drop of thin oil to the brass knobor profile and to the small copper tongue spring and copper catch pin
lf the arm fails to light up when in operation, raise the arm in the manner previously described, and examine the bulb, replacing it, if necessary, with one of the same size and wattage as fitted originally, or upgrade to the LED option above. Do not attempt to remove the bulb holder while the Trafficator is switched on, as this may cause a short circuit.
The methods of replacing bulbs in the external and flush types of Trafficators are illustrated in Figs. 4 and 5. In the case of the model shown in Fig. 4, to replace the bulb withdraw the screw on the underside of the arm and slide off the metal plate; the burnt-out bulb can then be replaced. To replace the metal plate, slide it on in an upwards direction, so that the side plates engage with the slots on the underside of the spindle bearing. Finally, secure the plate by means of its fixing screw.

Fig. 4 Flush-fitting type of Trafficator. Small trigger or catch at the end is secured with a screw. The top plate can then be swung upwards and unlatched from the inner end.
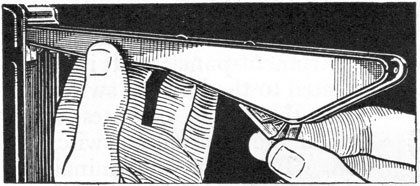
Fig. 5 Externally mounted type of Trafficator. Withdraw the bulb holder which is clipped into the underside of the arm by means of a meal tongue.
A faulty trafficator can be removed by disengaging the casing from the car body pillars. Usually, the casing is secured by six screws, with each screw having a cup washer under its head. It is necessary first to turn back the felt lining under the casing in order to reveal the actual trafficator screws. Two of these set-screws have a plain and spring washer, and when they are removed the trafficator unit may be pulled inwards away from the door pillar. Finally, the single-wire snap-joint connection must be released; this joint is inside the body of the indicator.
Next, carefully drill out the rivet shown in Fig. 6, and then remove the arm cover and withdraw the cable and bulb. Finally, open out the clip securing the cable and remove the arm.
When fitting a new arm, place this in position so that the arm stop-pin locates between the arm-lifting plate and locking plate and then secure it in place with a new rivet. Remove the arm cover to replace the cable and bulb and refit the cover. Then secure the cable to the arm by means of the clip, taking care to ensure that the bending cover of the clip does not damage the cable or its insulation.
Check that the cable can move freely when the trafficator is operated.
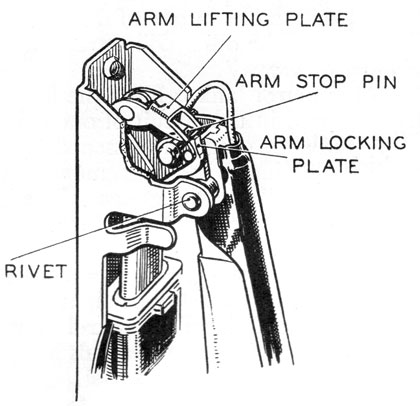
Fig. 6 Dismantling a Lucas-type Trafficator
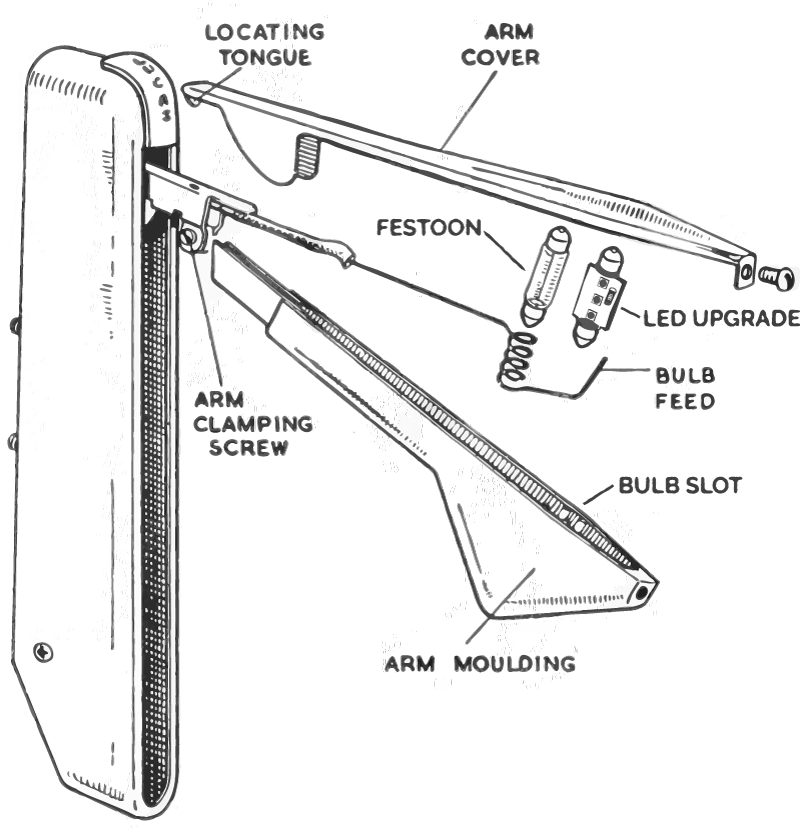
Fig. 7 Lucas SE100/SF80 Trafficator exploded diagram
Click to enlarge
We have new old stock for Lucas SE100/SF80 Trafficators, as well as new amber plastic arm mouldings, stainless-steel arm covers, bulbs and LED flashing bulbs.
Please note
All articles and guides are provided only for the interest of classic and vintage car owners. Much of the information presented will be old and it may be that since the period source material was created, better solutions have been found. A certain level of mechanical and electrical knowledge will be required in undertaking work as described in these articles, and anyone unsure of their abilities is advised to seek professional assistance.
Vintage Supplies Ltd cannot be held responsible for any breakages and injuries that may occur, while working on a vehicle following any guides provided. With older vehicles being exempt from MOT checks, responsibility for vehicle safety and legality rests entirely with the owner.